Wednesday, May 19, 2010

Composition: Layering

This is one my favorite subject to discuss about photography: layering. It incorporates a variety of subject matter into levels and results in more dynamic and complex photos. It incorporate the dynamic of foreground and background elements, rather than a shot of a single subject, alone. There are a variety of ways to accomplish this and we'll briefly discuss them.

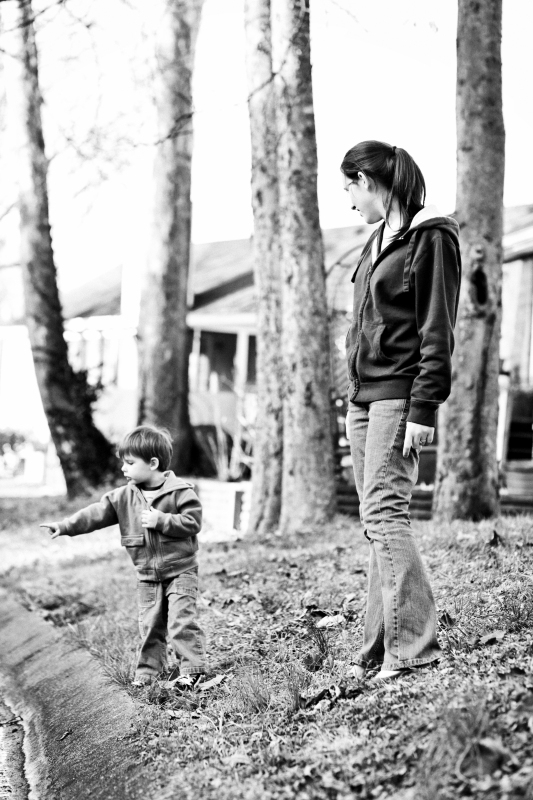
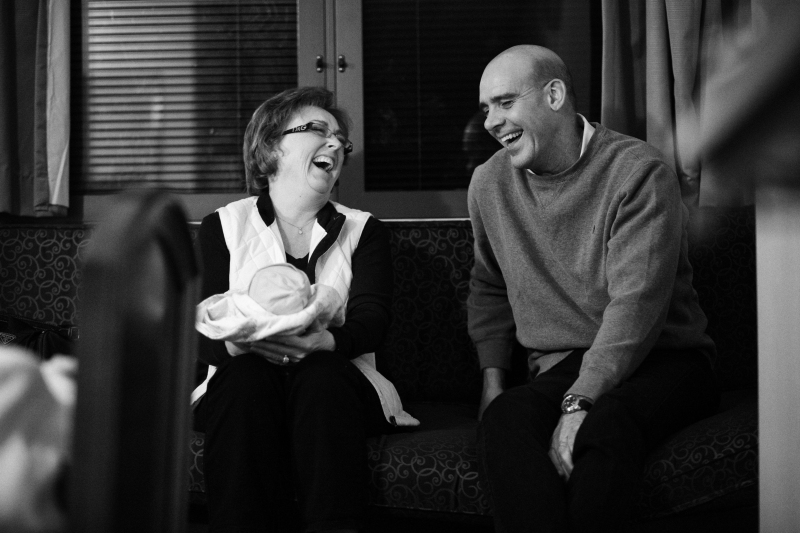
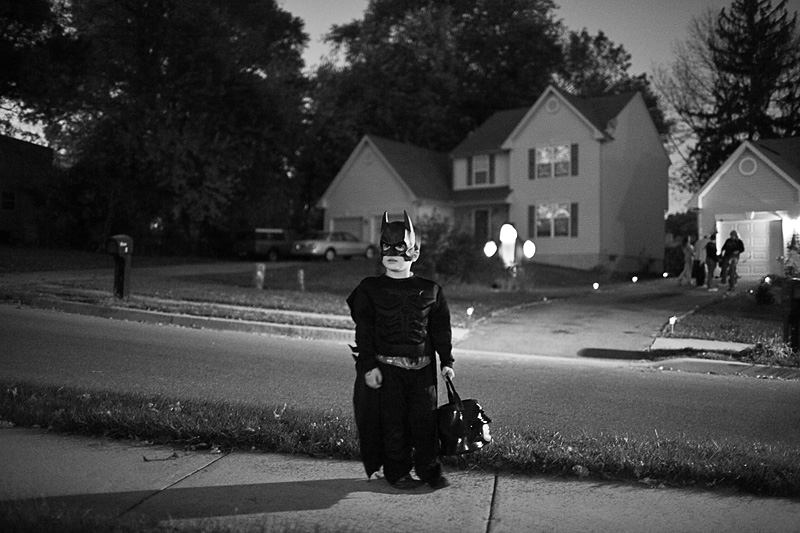
The idea is to balance the image, using inanimate and animate (people, animals) things to frame your subject (as mentioned above, in the foreground and background). Here's an example:

In this shot, notice that I was careful to achieve separation between each layer. If I were to overlap my wife or father-in-law with my mother-in-law (who's in the background), I would lose the layering and end up with an unbalanced picture. Remember that as photographers, we can't imply layers or depth, we have to show it. If you're not getting enough separation, change your angle until it's achieved. Separation is very important to achieve true depth in a photograph.

http://www.pbase.com/anerino/image/124750855/original

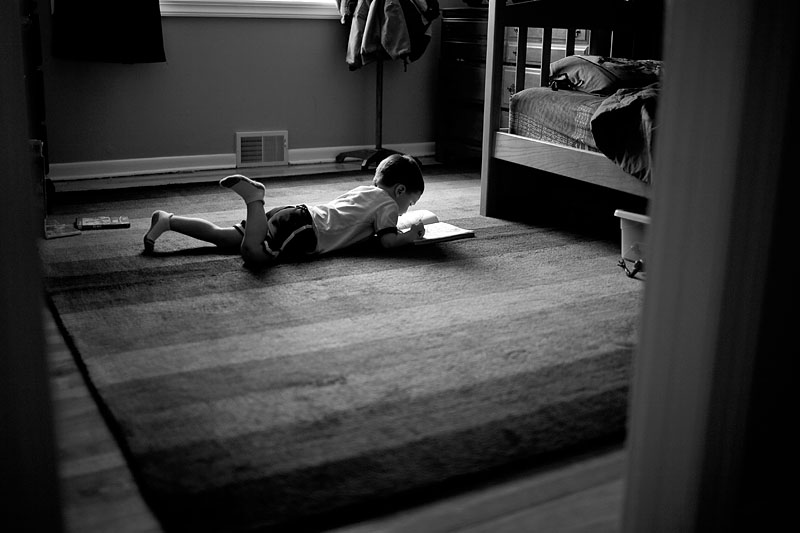
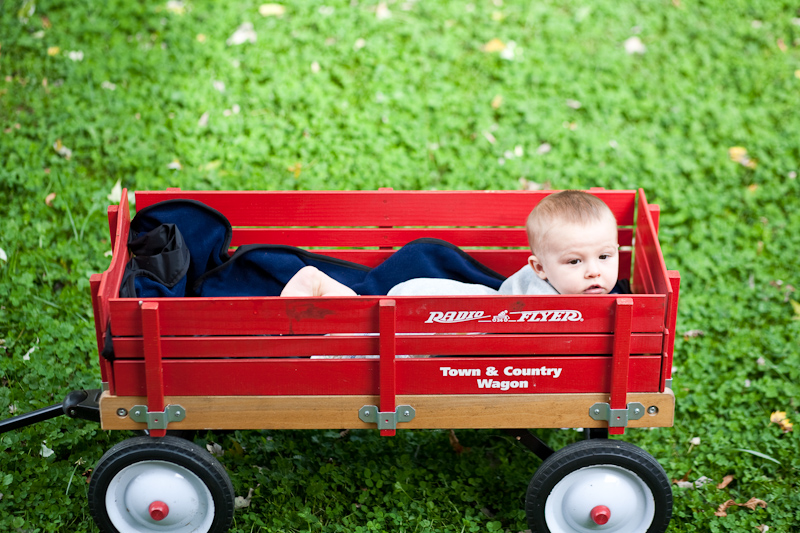
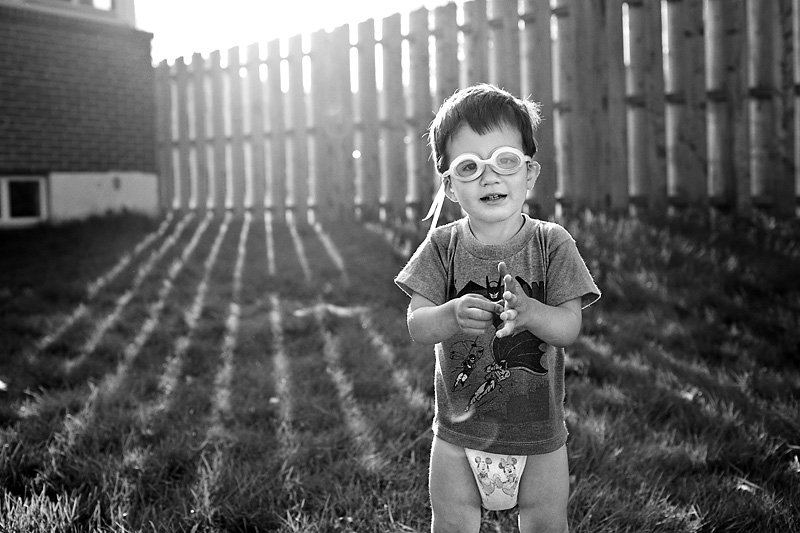
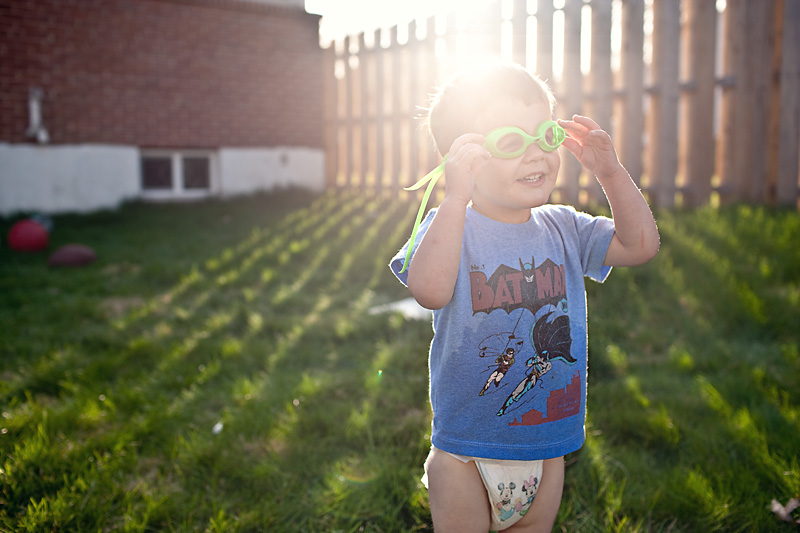
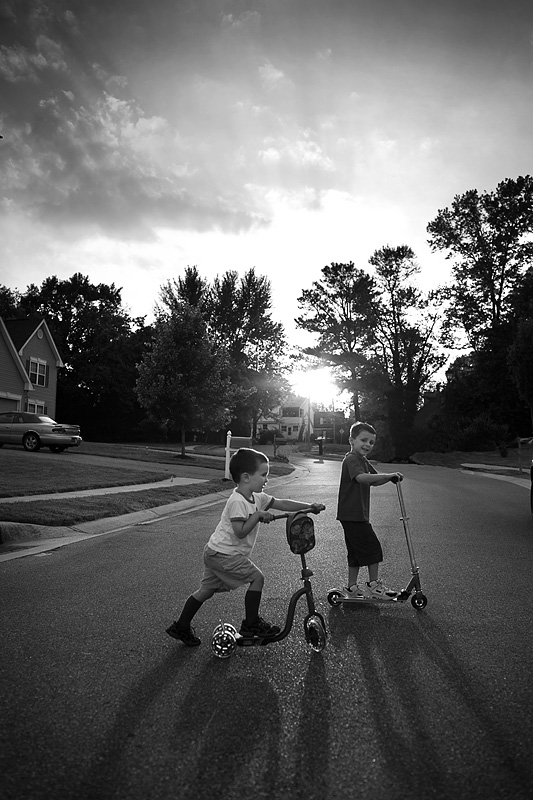
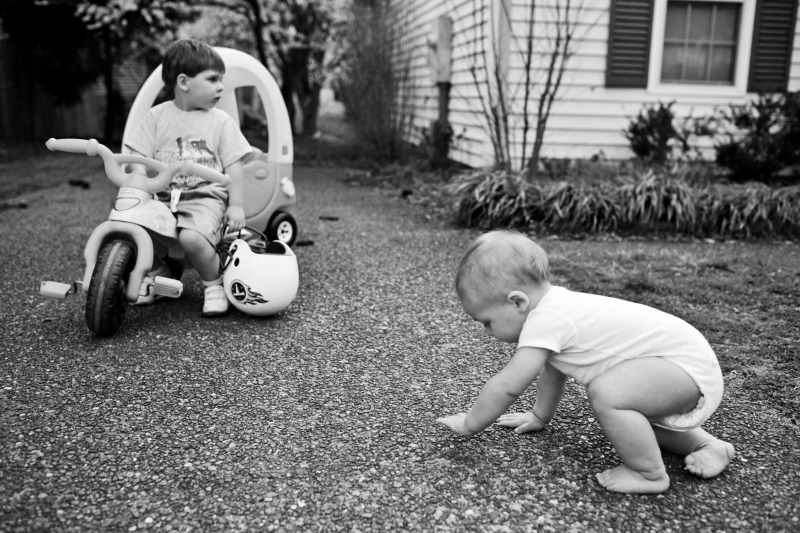
This is very simple layering. Rather than a two-dimensional shot of my youngest crawling outside, I framed him in front of my oldest son. Layering, even when simple, creates a more 3-dimensional look and balances out a composition.

http://www.pbase.com/anerino/image/124750852/original

http://www.pbase.com/anerino/image/124750849/original

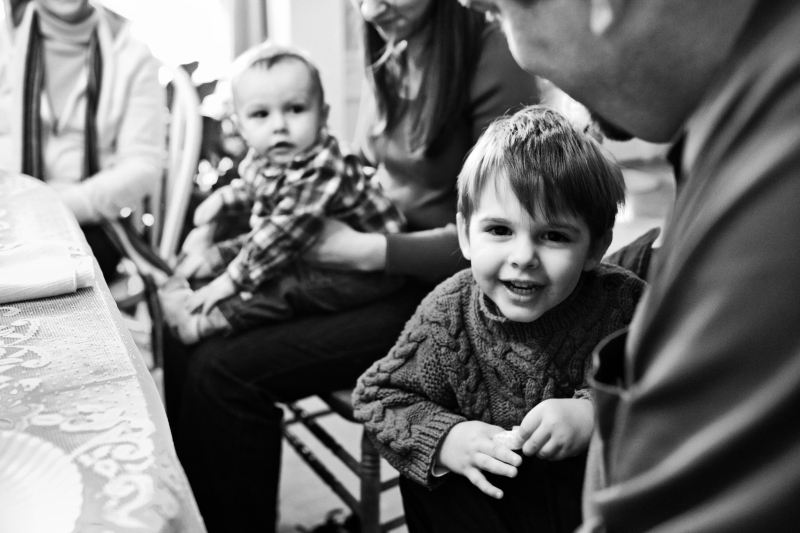
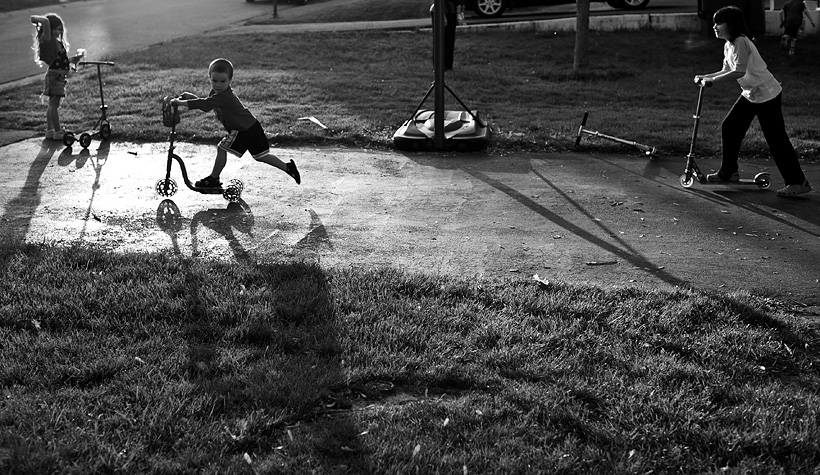
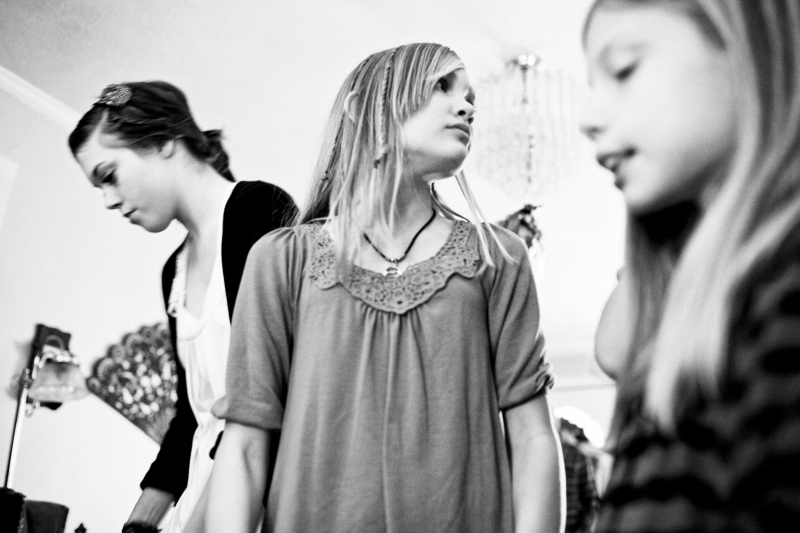
I love complex compositions like this. Each individual is doing something different, looking in a different direction. One of my favorite compositional tools is placing a face or body in the foreground (off to one side) and using that as a natural frame, leading the viewer into the shot and offering some context. (by the way, these are my cousins-we'll touch on expanding FPJ from immediate family in future posts)

http://www.pbase.com/anerino/image/124750854/original

http://www.pbase.com/anerino/image/124750851/original


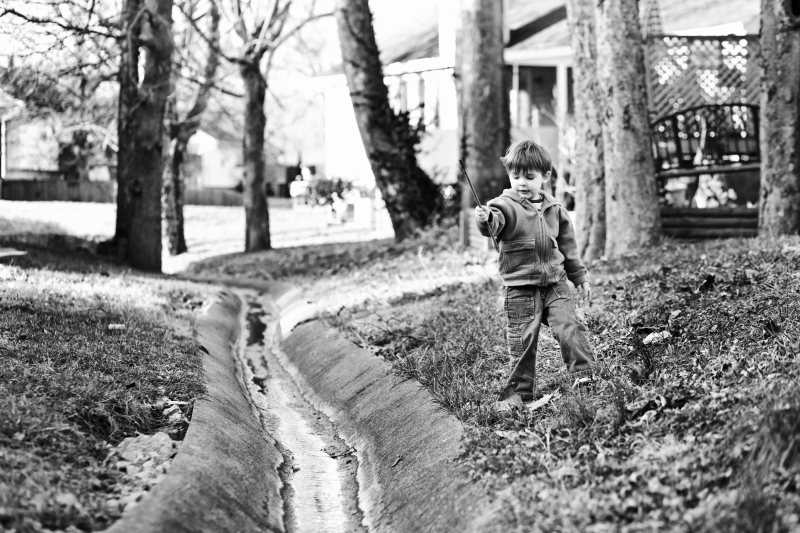
In this shot, my oldest (Henry) was eating icicles. Nothing groundbreaking. However, my wife began to photograph him. I chose to take a lower angle, using them to frame one another and tell part of the story of that afternoon through simple layering.

http://www.pbase.com/anerino/image/124750850/original

http://www.pbase.com/anerino/image/124750845/original

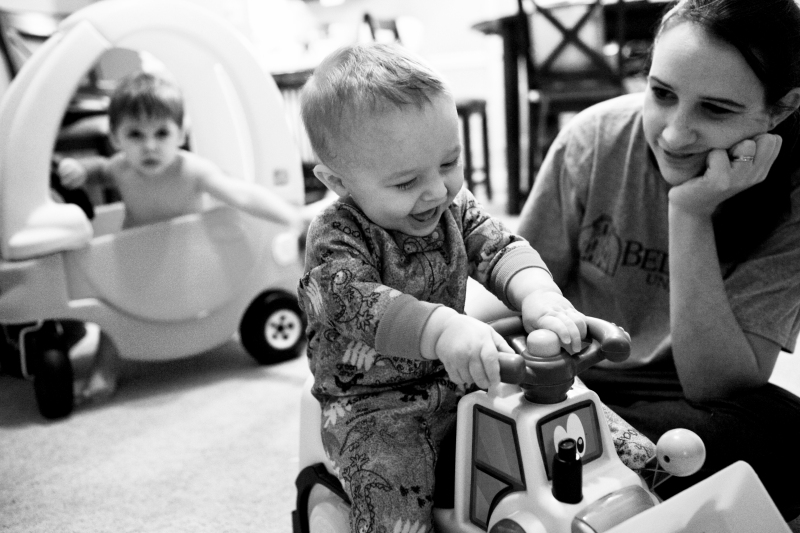
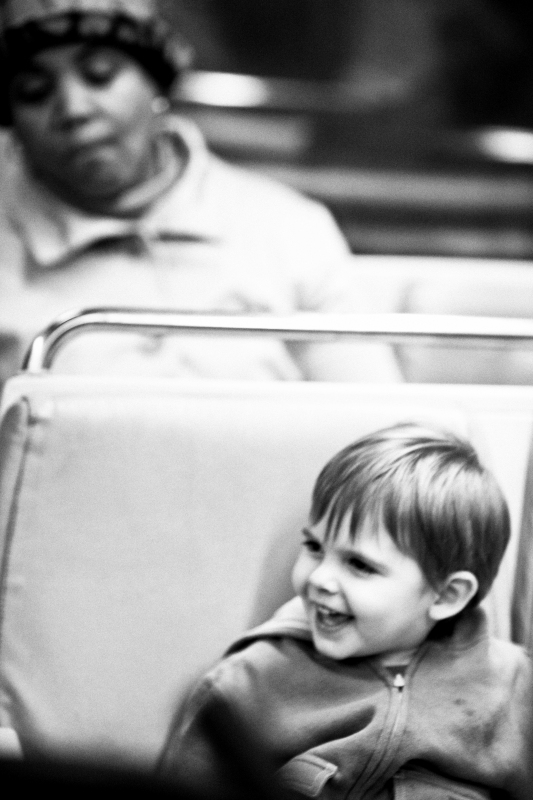
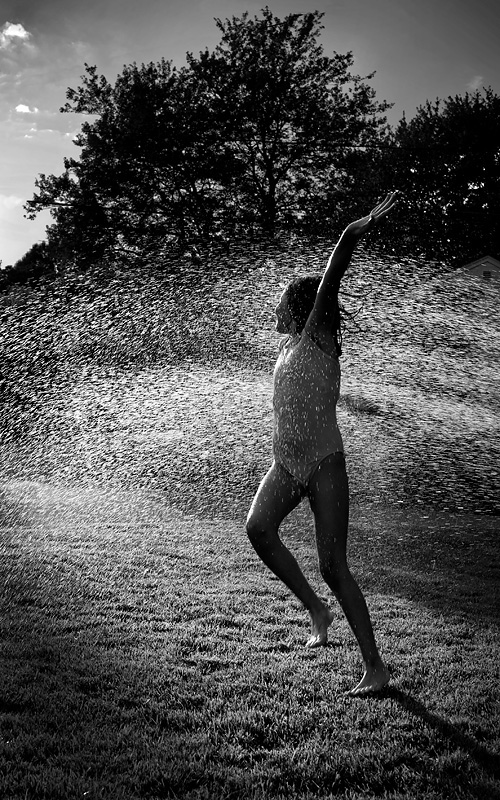
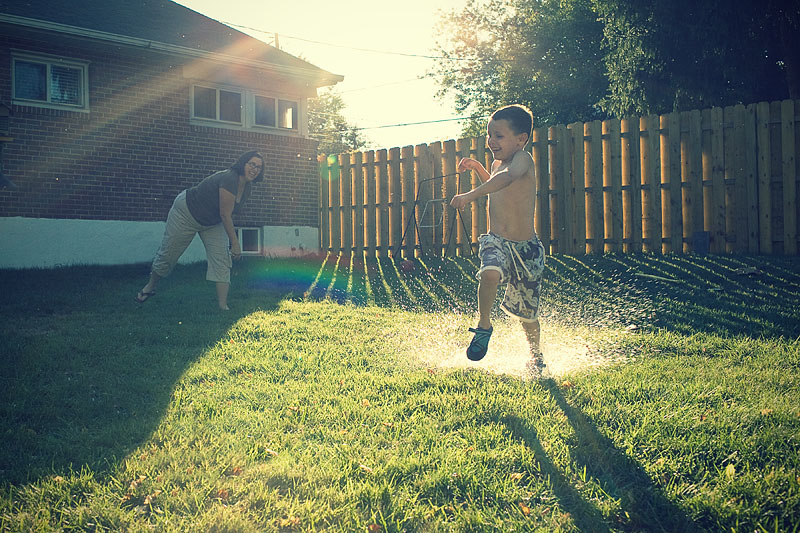
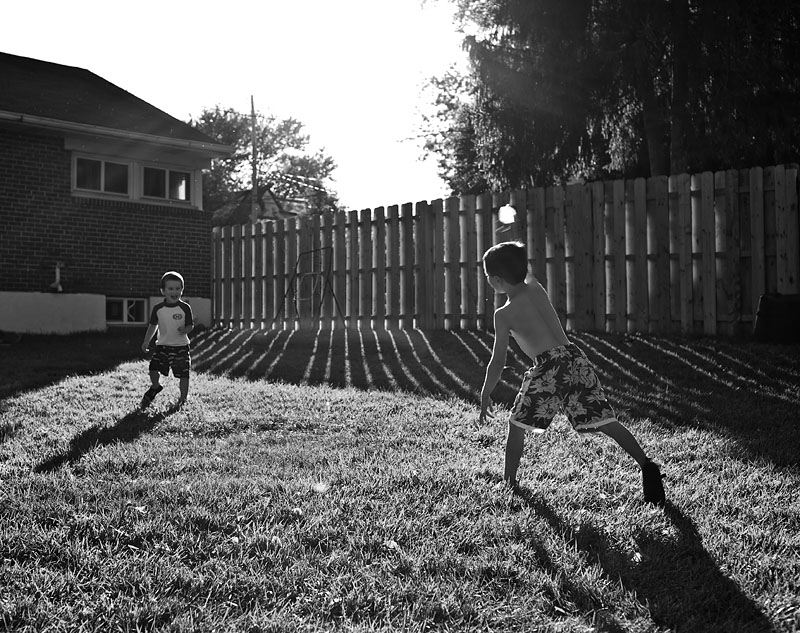
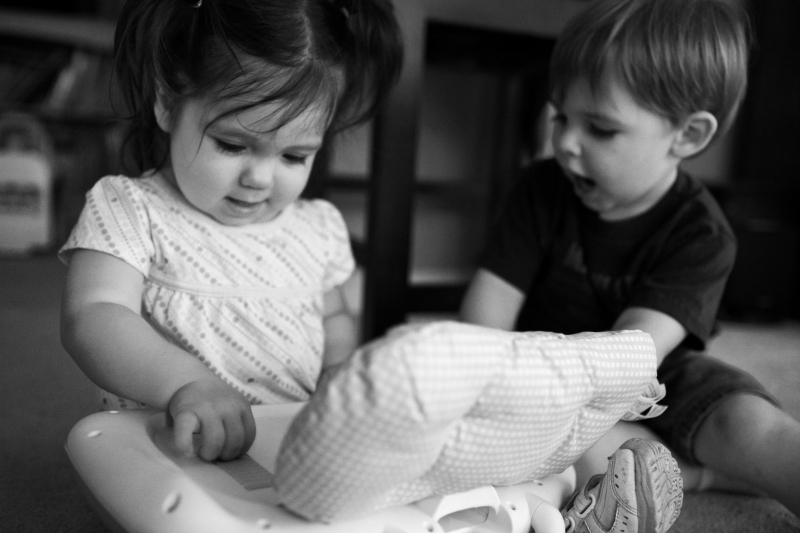
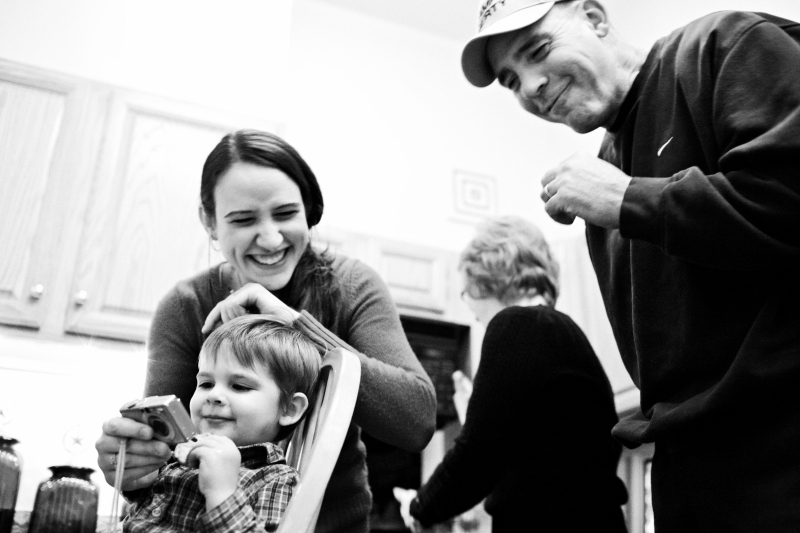
It helps when there are multiple areas of action at once. Layering (or creating levels in an image) is not always enough to take a shot to a more interesting level. Sometimes, the action has to be there. In this shot, you'll see both my son and my wife playing. There's a type of parallel motion between them as well (you'll notice they're both reaching forward with their arms, both leaning to camera right).

http://www.pbase.com/anerino/image/124750848/original

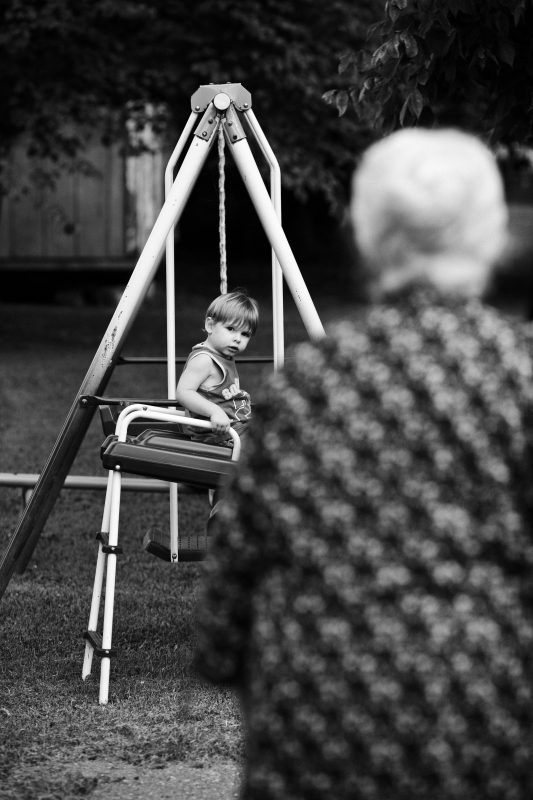
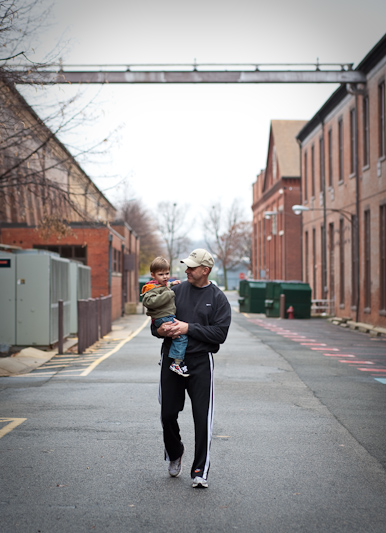
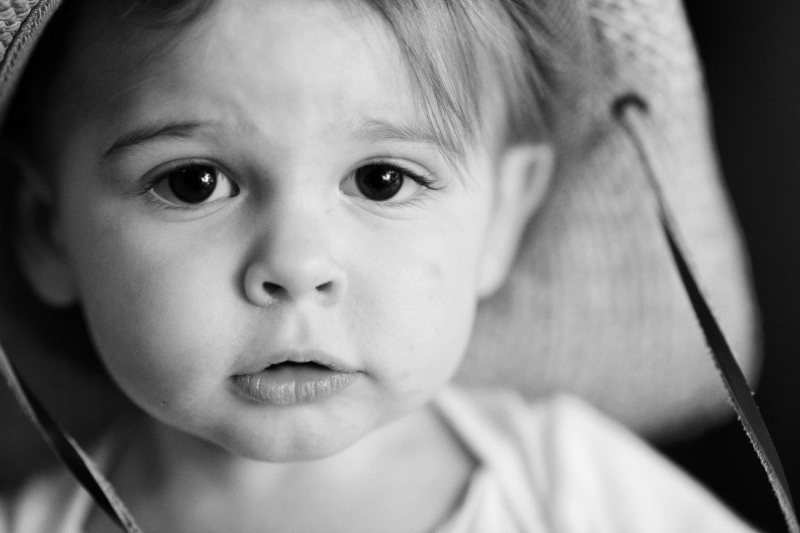
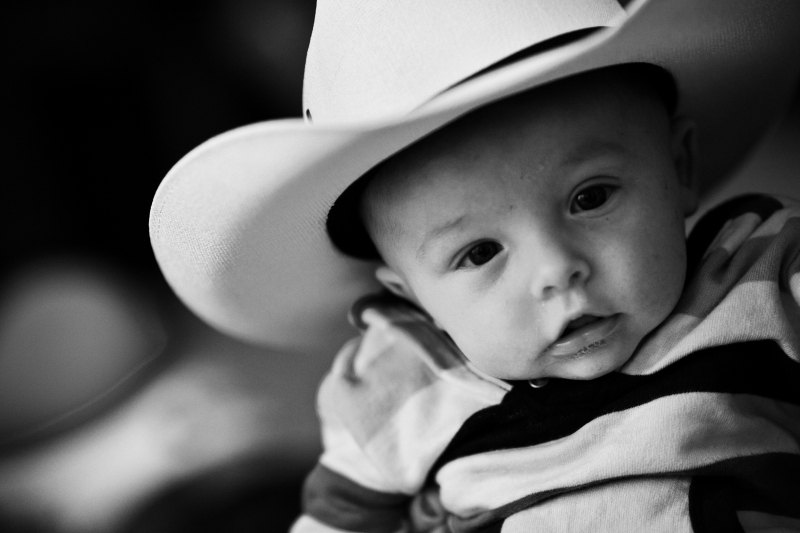
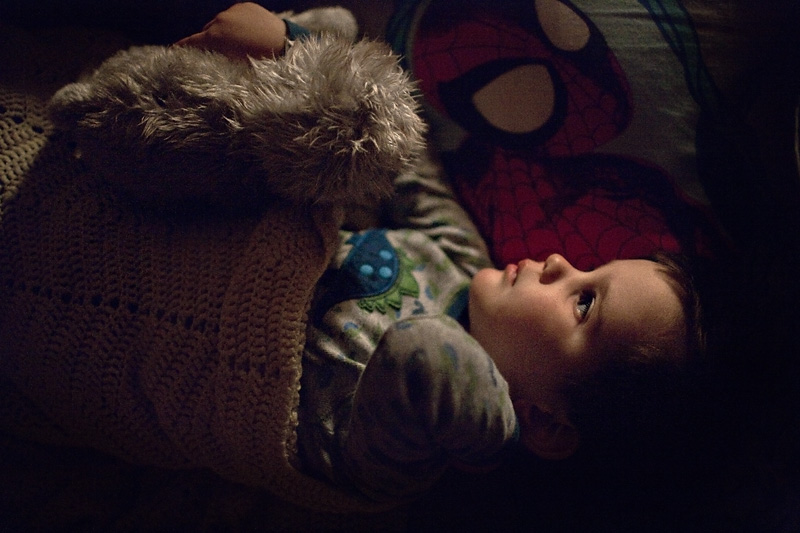
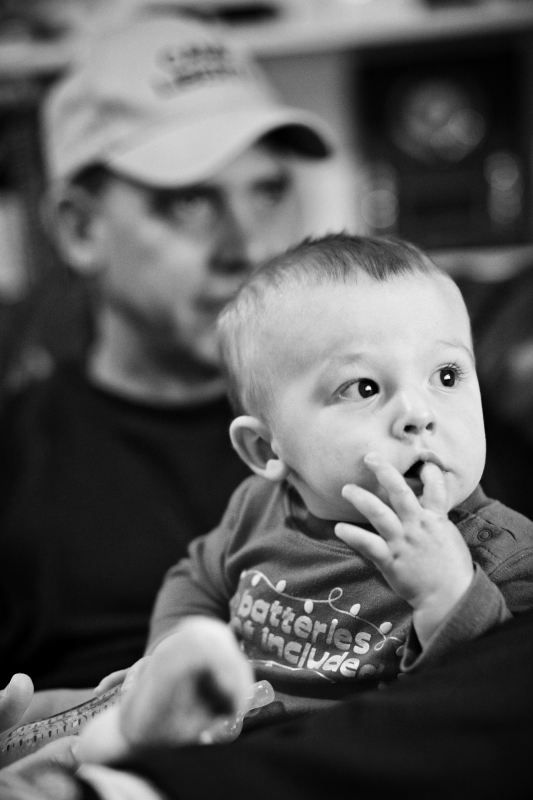
I included this shot as an example of using this compositional technique with telephoto lenses. Rather than capture a headshot of my youngest, I chose to frame him with his grandfather behind him, incidentally providing context to where they are and who is present.

http://www.pbase.com/anerino/image/124750846/original

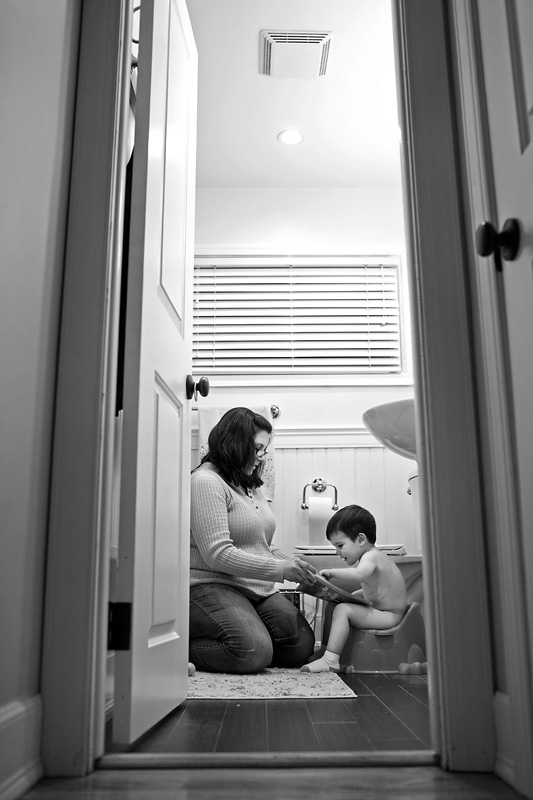
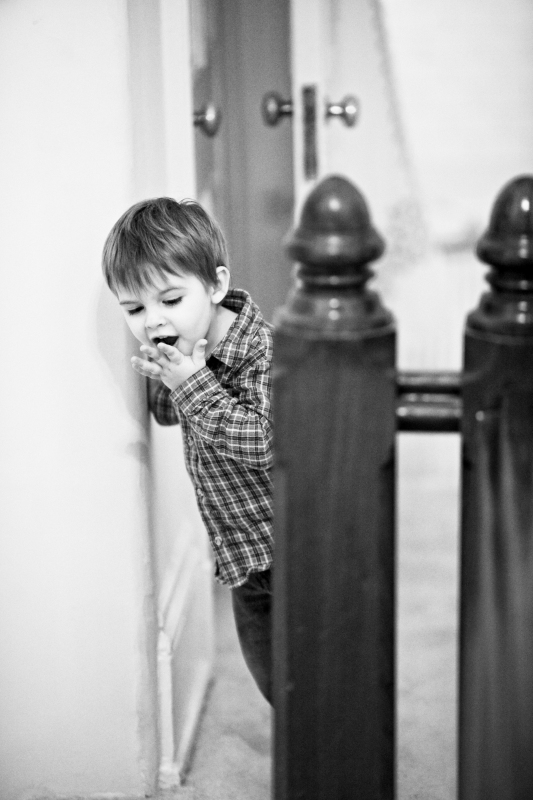
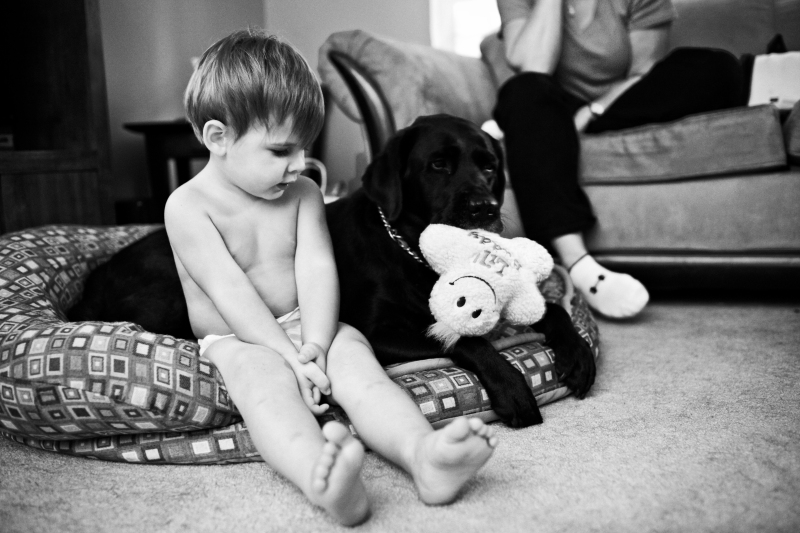
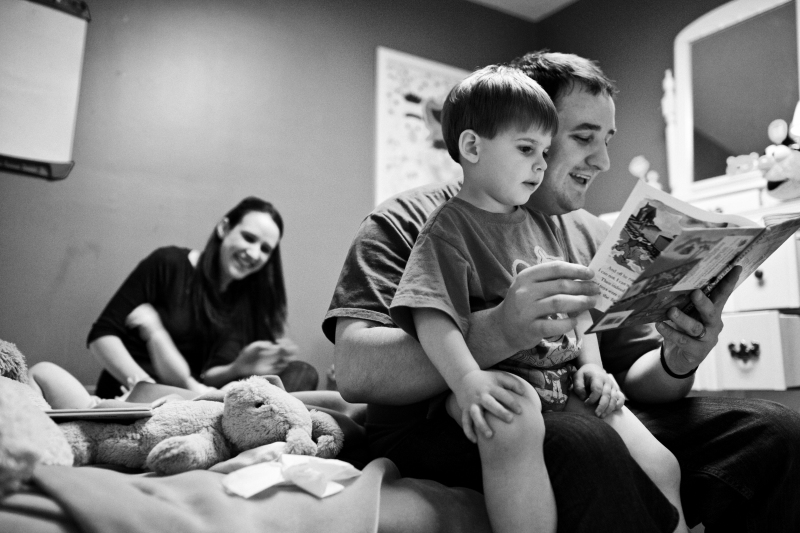
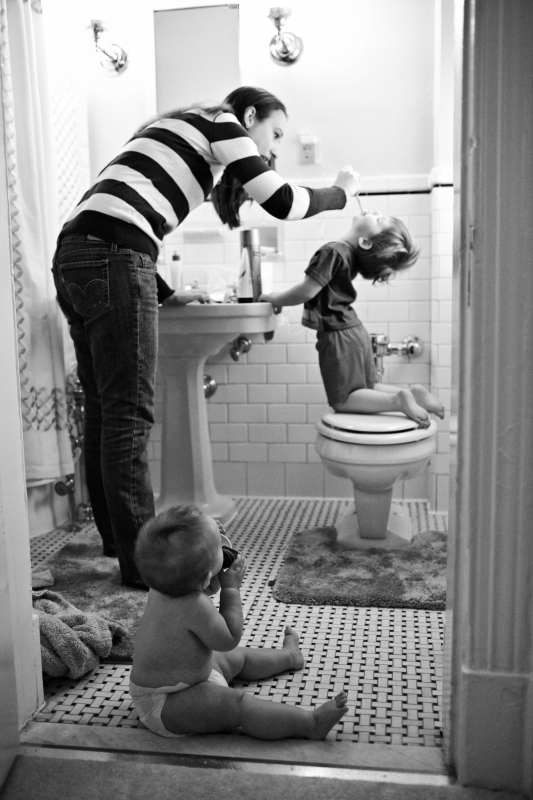
This is one of my favorite shots because of the way everyone is spaced. You just have to be ready to capture it when it happens IF you're waiting for it to happen naturally (which as a family PJ, we usually are). I used my youngest (as he looks on) to frame the action in front of him. I also used the doorway to frame them, making this photo more complex than if I had stepped into the bathroom and grabbed a tighter shot of what was happening.

http://www.pbase.com/anerino/image/124750847/original

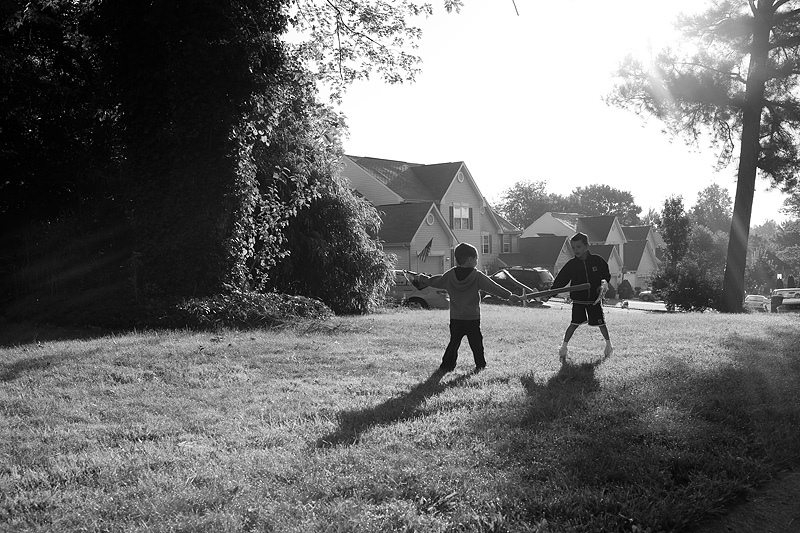
Layering takes time and practice. It takes forethought but the results are well worth it. It's a skill I admire in the most gifted of photographers. By using it, it will take your compositions to a higher level, create a visual dynamic, take images from two to three dimensional, and add complexity to what might be otherwise flat images. Not to say that simple isn't good (I love that, too). As always, thanks for stopping by, guys and girls.

daniel

Wednesday, May 12, 2010

Using Doorways to Frame Your Subjects

A very simple way to help a composition along is to frame it with an object. As family photojournalists, we are often shooting in our homes; therefore, finding frames for our subjects can be a challenge.

The simplest way that I have found to add a frame to your subjects in the home is by using a doorway! This compositional element is one of my favorite ways to compose a shot. It is simple and very effective.

Try this: Set your child up with a favorite activity by a window in a room with a doorway. Let your child get good and engaged in what he is doing. Step outside the room and frame the subject with the doorway. The major advantage of this is you get a 'real' moment...your child being your child without adult influence.

Here are some examples:

http://www.pbase.com/anerino/image/95856064/original


http://www.pbase.com/anerino/image/121468423/original


http://www.pbase.com/anerino/image/95854991/original


http://www.pbase.com/anerino/image/98897886/original

Try it, I think you'll like it :)

Thanks for checking in! Contact us at thefamilyphotojournalist @ gmail.com with any questions or suggestions!

Chuck

Monday, April 26, 2010

Telephotos Can Do the Job, Too

Historically, photojournalists have shot wide to normal focal lengths (ex. 20mm, 24mm, 35mm, 50mm). Things have obviously changed but 35mm and 50mm are still very popular lenses and get a great deal of usage in order to tell a story visually. However, there are times that photojournalists are unable to get near the action or they are unwilling to disturb their subjects. In that case, a longer lens becomes necessary. You might find them limiting and feel they're only good for headshots or portraits. When used the right way, though, you can create some wonderful storytelling images.

This post will briefly address using telephoto lenses (TLs) to tell stories. Many of the same rules of composition apply with wide angle and TLs. Rule of thirds. Using leading lines and natural frames to draw interest into the photo and then direct the viewer toward the subject . Finding patterns and symmetry and so on. As with wide angle, include any important visuals in the frame that will help tell the story; leave any unnecessary visuals out. There's no right or wrong way to capture a story, so use the lens that will get the job done best. Sometimes, my 85 or 135mm lens is the better choice.

Benefits of using telephoto lenses here:

1. the subject may be less aware or wary of your presence-they may not play up to the camera as much, which will allow you to capture more natural behaviors out of your kiddos

2. compression-longer lenses make things appear closer together than they really are (you may already know this)-consider how this could help you layer your compositions in a more interesting way

3. longer lenses have shallower depth of field (DOF) at wider apertures than wide angles, allowing you to isolate your subject from the background more easily

4. in addition to isolating your subjects using shallow DOF, you can isolate elements that tell the story and simultaneously, eliminate clutter (sometimes, clutter works and sometimes, it's one of those elements you should eliminate)-it's all the judgment call of the photographer

Here are some examples taken with either the 85 f/1.8 or the 135 f/2L lens.

Taken with the 135L at a local fountain. It was nice to be able to frame him against the water from a comfortable, seated position, some 20-25 feet away. The telephoto also compressed the scene, making the shoots of water appear to be closer together than they truly were.

http://www.pbase.com/anerino/image/123996516/original

Taken with 85mm.

http://www.pbase.com/anerino/image/123992056/original

Taken with 85mm.

http://www.pbase.com/anerino/image/123992060/original

Since I used the 85mm lens, I was farther away from Henry than if I had used a wider lens and framed similarly. It gave me more time to wait for the moment I wanted (with a wider lens, he wouldn't been on top of me in a couple seconds), when he looked up at me. I was also able to track him easier at that distance using AI Servo.

http://www.pbase.com/anerino/image/123992068/original

Taken at 85mm.

http://www.pbase.com/anerino/image/124022985/original

Taken at 135mm.

http://www.pbase.com/anerino/image/123996517/original

Here is an example of how short telephotos can still be used to show context. I liked the moment my son and father-in-law were sharing and shooting from afar allowed that to continue, uninterrupted. Taken at 85mm.

http://www.pbase.com/anerino/image/123992072/original

Taken at 135mm.

http://www.pbase.com/anerino/image/124023740/original

I don't give a second thought to pushing my hands holds to get a shot (this means, I frequently shoot below the suggested shutter speed of 1/focal length). This shot was taken on a subway train and the softness doesn't bother me. The moment's there. Taken at 135mm.

http://www.pbase.com/anerino/image/124023739/original

Don't limit yourself to just one lens. Learn to see which lens will work for the shot you envision and grab that one. You'll appreciate the point of view it will give you, which is very different from that of a 24 or 35mm lens.

Email us with comments and questions. We want to cater this blog to our readers. Thanks for continuing to visit us.

daniel

Monday, April 19, 2010

Natural Light Shooting in Backlit Conditions

Spring/Summer is one of my favorite times of the year to shoot! My children LOVE being outdoors after months of being crammed inside due to frigid temperatures. They are all too eager to jump on a slide, ride a scooter, and play in water. To me, these are the things childhood is made of! On top of it all, the light is fantastic this time of year.

One way I like to enhance these warm/whimsical moments is by shooting in backlit conditions. Backlighting creates such great tones and adds energy and warmth to an image. Backlighting, simply put, is when your light source is behind your subject. So basically, it is when the photographer shoots 'into' their light source.

Backlit scenes can be challenging for the family photojournalist for a few reasons: 1. we are often shooting wide, so if we go by our light meter, we will often underexpose our subject. 2. we have been told to look at the histogram and not to 'blow the highlights'. when shooting backlit with natural light, you will blow the highlights.

So how do we shoot backlit scenes?

1. Expose FOR YOUR SUBJECT. I shoot in M (manual) mode 95% of the time. So I will often times get really close to my subject (fill the frame with your subject) and dial in the exposure using my in camera light meter. When you step back to recompose your scene, your light meter is going to lie to you! It is going to read that the scene is overexposed. But we know that our subject is exposed perfectly!

2. Work the sun! We are generally shooting into the sun. However, you can place the sun just off to the side so that its just outside of the framing of the photo. Also, I like to put the sun just behind the subject's head. A lot of time this will yield lens flare. Sometimes this is desirable other times it is not. So it really depends on your intentions! So move the sun around in the frame to play with different effects.

3. Post processing a backlit shot. Shooting backlit will often cause your subjects to be less contrasty. I try to capture back some of that loss of contrast in a few ways (I use Photoshop CS4): a.) Using ACR (Adobe RAW Convertor), I will often increase my blacks from a +5 (the default) to about a +10. Obviously, this is arbitrary and will vary from image to image. b.) Using ACR, I will often adjust the clarity to about a +10 (again, vary from image to image). c.) After any editing I do to an image, I will often 'dodge and burn' the photo for any 'local' tonal adjustments (to see how I dodge and burn, go to my tutorial on 'seeing in black and white').

Below are a few examples of shots in backlit conditions using the techniques above:


http://www.pbase.com/anerino/image/123762763/original


http://www.pbase.com/anerino/image/123762764/original


http://www.pbase.com/anerino/image/99573247/original


http://www.pbase.com/anerino/image/97160043/original


http://www.pbase.com/anerino/image/103460754/original


http://www.pbase.com/anerino/image/103424505/original


http://www.pbase.com/anerino/image/99303637/original


http://www.pbase.com/anerino/image/103424530/original


Quick recap: Meter your subject, not the background. Position the sun in various locations. Recapture some contrast in post processing. Have fun with it!


Thanks for stopping by! Contact us at thefamilyphotojournalist@gmail.com if you have any questions!

Chuck

Monday, April 5, 2010

Using Flash

While most everything Chuck and I shoot utilizes natural light/ambient light only, there are times where flash is called for. Flash can be used for numerous reasons: fill (fill in the shadows), main (light light, overpowering existing ambient lighting), or blending (a mixture of flash and ambient). While you may not use flash often, as I don't, it's certainly a skill that is vital to getting the shot no matter what the circumstances. After all, f/1.4 lenses are great but not everyone can afford them and even if you can afford them, they may not be enough. This post will be the first in a series (will post on flash from time to time) about on-camera hot shoe flashes. We won't discuss built-in flashes, since there's very little you can do creatively with them.

Most times, when I pull out my flash, I'm shooting impromtu, informal shots of my boys. Here are a couple examples:

http://www.pbase.com/anerino/image/123341496/original

http://www.pbase.com/anerino/image/123341494/original

But The Family Photojournalist is about more than just portrait documentaries, though this is certainly a reasonable aspect of it (see Steve McCurry's head shots of Afghanis, etc). Flash can be used to light or augment your subjects in a very pleasing way. One negative is that the burst of flash can draw attention to you, but if you are careful with your compositions and take your time getting the shot, you shouldn't be firing away every few seconds anyways.

First, let's discuss bounce. Shooting on-camera flash is usually frowned upon and for good reason. It's flat and dull. Anyone with a point and shoot can do this. You bought an SLR, why not enhance them with flash instead of kill them? By bouncing your flash off a side wall, for instance, you turn your living room wall into a giant softbox. Example:

http://www.pbase.com/anerino/image/123340329/original

This shot was taken by bouncing my canon 580 exII off of the far wall, directly to camera right (which is about 15 feet away). The quality of light improves dramatically, rendering a softer, more pleasing light on your subjects. Also, by bouncing it from the side, it shapes my wife and son's faces nicely. By shaping, I mean that it creates pleasing shadows which outline the face and add a more 3-dimensional aspect to it.

Side note: Light modifiers have their place but if you can find a place to bounce your flash, you won't need a modifier (I never use one).

Here's another using side bounce off our front door, which is white:

http://www.pbase.com/anerino/image/123340327/original

Flash is also great for shooting in your house at night. Overhead lights cast those raccoon shadows. By bouncing flash, you get to choose the quality and direction of the light. In other words, you decide which direction your light is coming. Instead of overhead or from a nearby lamp, it can come from the side, from 45 degrees up, etc.

My usual settings will vary depending on how I want the image to look but generally, I'll get an ambient reading and then underexpose between 2/3 to 1 2/3 stops and allow the flash to fill in. This keeps makes the flash the main light but allows some of the ambient light to remain. The more you underexpose, the more subdued your ambient light will appear. I usually use full evaluative metering mode and overexpose the flash exposure by 2/3 to 1 full stop. Remember, though, that flash exposure works the same as a camera meter (exposing for neutral gray) so consider if your scene is mostly light or mostly dark which will change things.

Things to consider when bouncing flash:

1. lighter walls are preferred-colors such as white, light blue, yellow, and even tan provide a good bouncing surface-darker colors will eat up your flash
2. be careful of white balance when bouncing-if you shoot black and white, as chuck and I often do, it won't be much of an issue but if you're shooting for color, your flash will take on the color properties of the wall itself (and it's tough to fix)
3. watch the direction of your bounce-you usually can't go wrong when pointing the flash directly to the left of right-avoid pointing it straight up at the ceiling, which results in shadows around the eyes (i.e., raccoon eyes)-you can even point your flash 45 degree up and behind you (which allows you to use the ceiling but the light does not hit the subject from directly overhead)

Here's an example of the 45 degree flash position (I actually used this same 45 degree position to light the shot below):

http://www.pbase.com/anerino/image/123343241/original

4. if you don't have a wall, look for something to bounce flash off of-it could be someone's white shirt (that they're wearing), white furniture, window blinds, etc-try this sometime, you'll be surprised that it works (esp. when you don't have another choice)
5. experiment-learn how to use your flash-you can read all you want but if you don't slap on your flash and use it a bit, it won't be worth using when you need it

I wouldn't recommend one flash brand over another for family photojournalism. I use Canon professional flashes since I shoot professionally as well. It makes sense for what I do. There is also the Sigma DG series (which i used to own and liked), Sunpak series (which i've also owned), and others. The important thing is that your flash has E-TTL capabilities (meaning, it can sync with your camera which helps it determine how to properly expose the shot) and has tilt and swivel capabilities (for bouncing flash off stuff).

One other benefit of using a hot shoe flash is that it provides an AF assist beam, which helps the camera focus in very low light. You can get focus on something in near darkness with that beam and that can come in very handy.

http://www.pbase.com/anerino/image/123340331/original

Even though this shot has been posted before, it's the only shot in the birth series that used flash and I felt it was appropriate for this post.

http://www.pbase.com/anerino/image/121505473/original

http://www.pbase.com/anerino/image/123373819/original

I hope this has been useful. Please send us emails if there are things you'd like to be explained better or want us to go into more depth. I don't plan to go into technical stuff like lighting patterns, etc., but I'm glad to help you via email if I can. Your thoughts and ideas help us shape upcoming posts and the emails we've received so far are greatly appreciated, guys.

daniel

Sunday, March 28, 2010

Email Us!

We have an email address! We hope to continue to provide top notch information as The Family Photojournalist grows, so do not hesitate to shoot us an email with your questions, criticisms, and suggestions!

thefamilyphotojournalist at gmail.com (instead of the 'at' use the @ symbol). I wrote it this way to avoid spammers.

Daniel and I would love to hear from you!

Chuck

Keepin' the Mood!

"YOU MUST HAVE DETAIL IN YOUR SHADOWS AND HIGHLIGHTS," the book says. "YOUR HIGHLIGHTS ARE BLOWN AND YOU COMPLETELY LOST YOUR SHADOWS," says the internet critiquer.

I read statements like the ones above when I first started shooting and felt like I was failing at photography because it seemed that no matter how hard I tried, I was often blowing highlights and/or losing detail in my shadows. Many of my images would often look good to my eye, but it seemed that everything I read told me that what I was doing was wrong.

The easiest way to see if your highlights are blown or your shadows are lost is to check your levels (in photoshop, image > adjustments > levels). If the chart spills past the right, your highlights are blown. If it spills of the left, you lost detail in your shadows.

While the histogram is a great tool to use, sometimes I do not want all tones to represented a scene. Sometimes, if we expose for all tones in a scene, it will absolutely destroy the mood and we will end up with an image that does not look like the scene we shot!

So I encourage you trust your eye and disregard the histogram (sometimes)! Keep the mood!

The images below have severely flawed histograms but I feel have a mood to them and represent what the scene actually looked like:


My youngest minutes before he fell asleep. The only light was from a hallway light coming through a crack in the door:
http://www.pbase.com/anerino/image/123114097/original


My nephew's 7th birthday. Candles were the only light in the room. If I shot for a balanced histogram, it would appear that the lights were on in the room!
http://www.pbase.com/anerino/image/117456638/original


Halloween. It was DARK (1/20th, f/1.4, ISO3200).
http://www.pbase.com/anerino/image/107248532/original


Birth of my youngest child. The dramatic lighting was caused by the spotlight that the surgeon was using. If I used a flash to balance out the background, this image would not be as dramatic.
http://www.pbase.com/anerino/image/91155144/original


Ditch the histogram and trust your eyes!

Thanks for checking in!


Chuck