Sunday, September 4, 2011

Framing Elements

Hey guys. Been a while. I'm trying to get one in before Tuesday--my wife and I are having a little girl that day. So, I'll be out of commission for a spell.

In the last couple posts of mine, I'm sure you noticed that I used images taken in similar environments. This has been intentional and by it, I'm hoping to make the point that an image might be taken in many different ways. Many of our homes are not photo friendly. It can be frustrating, between the clutter and imperfect wall hangings. A good photographer can see beyond that, though, to find order amidst disorder. My photo heroes are able to do this, including Steve McCurry and Sam Abell. We have talked about visual organization before and will continue to because it's elemental in documentary work (or any other type for that matter).

Look for items which might act as natural frames. Simple shapes, non-distracting items, etc. The more simple the item, the less it will detract from your subject (generally speaking). Use this approach to create symmetry.

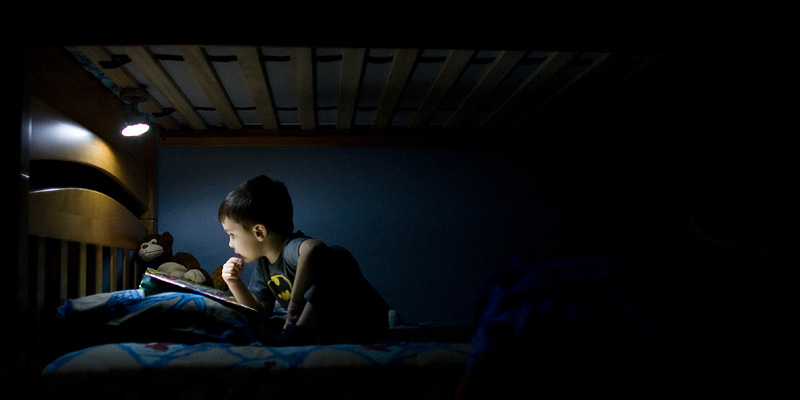
All 3 shots I'm sharing in this entry were taken in July in my boys' room. Two contain a singular element, which is the Sesame Street painting, the other a portion of the top bunk and curtains. The boys' room doesn't contain many interesting visual elements and I've learned that more is not always better (i.e., just shooting wide and letting the chips fall where they may). When the angle is right, the painting can be a useful element in organizing my shots.

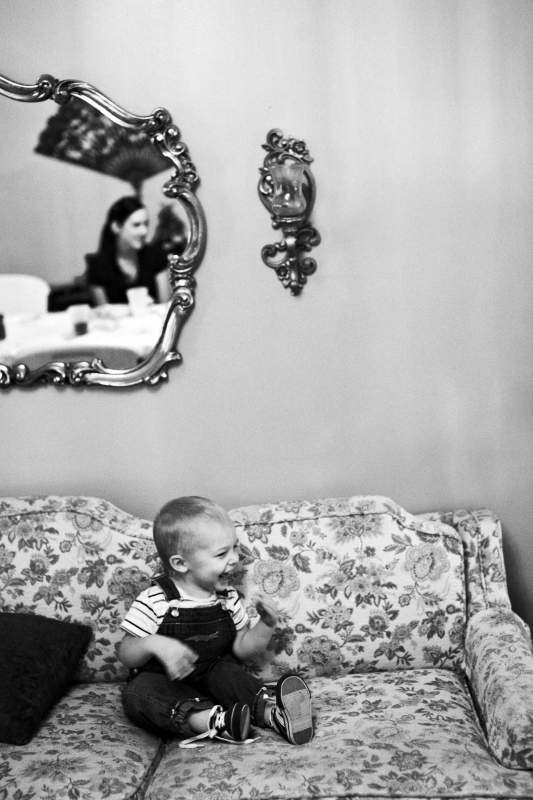
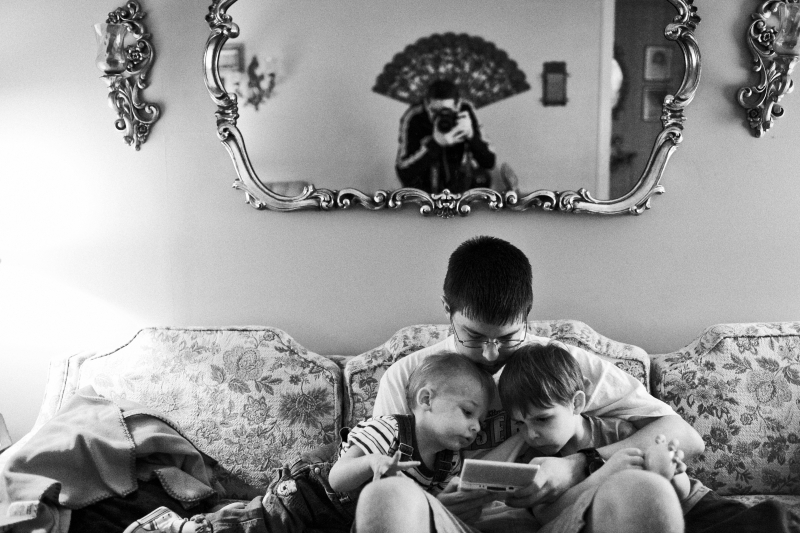
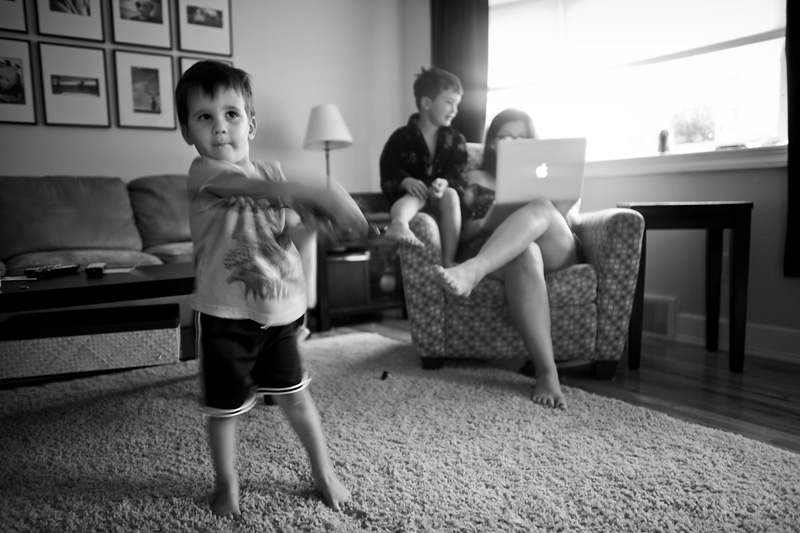
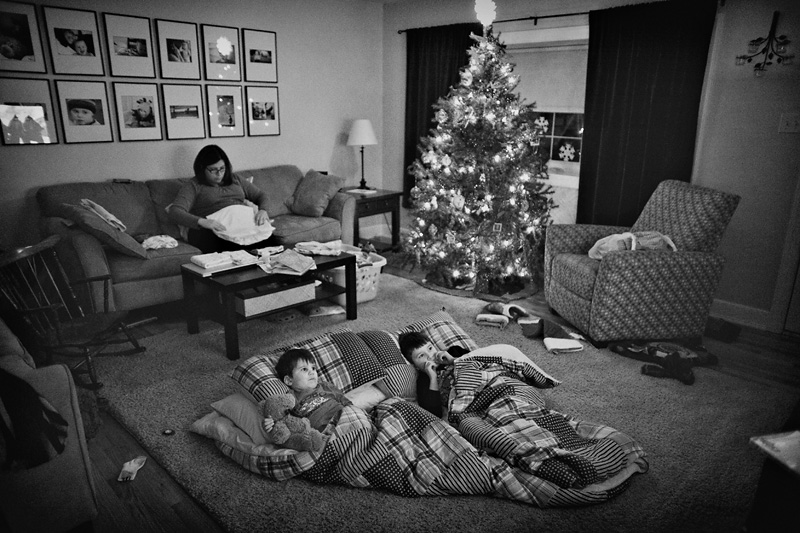
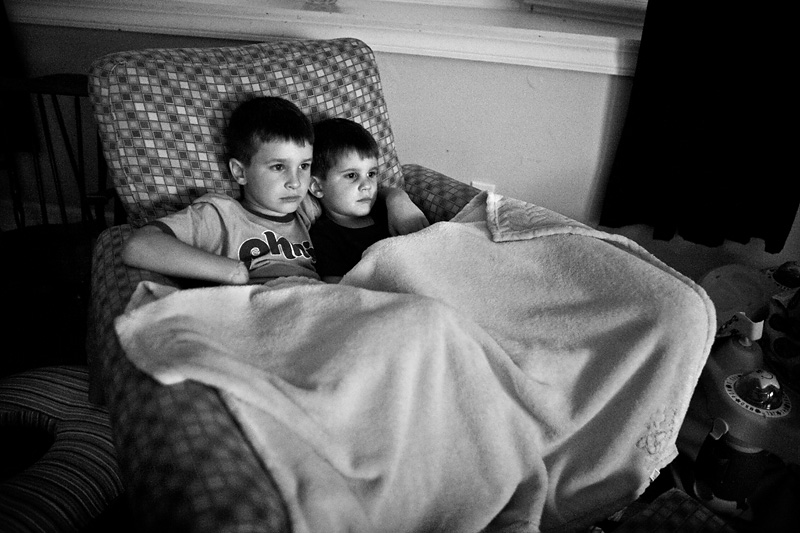
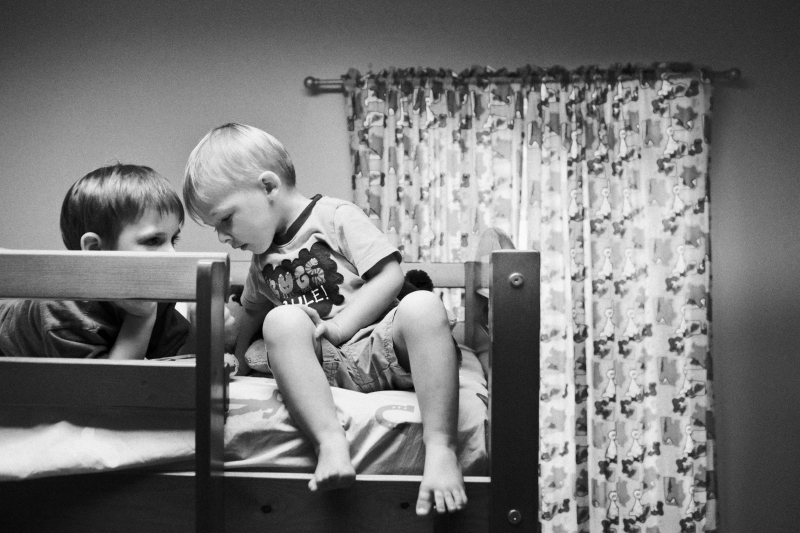
The shot below is a recent favorite of mine. I like the symmetric and boxy feel of this composition. I like my oldest son's eyes, which are barely visible over the safety bar. I like the way he and his brother's bodies lean in to one another, while their gazes are not singularly focused on the same area. This helps draw attention to their closeness while adding a tension to the image. I like the simplicity of it all. The window helps to close out the composition and keep the viewer from straying too far. It's very graphic.

http://www.pbase.com/anerino/image/137804063/original

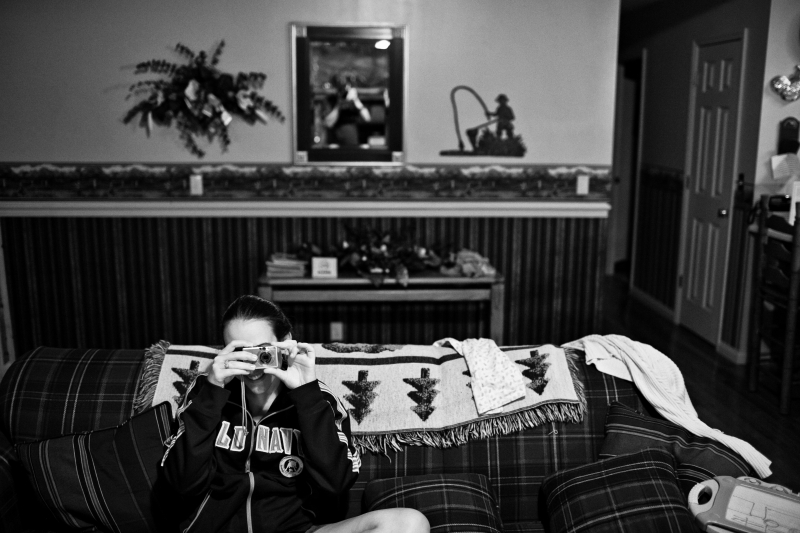
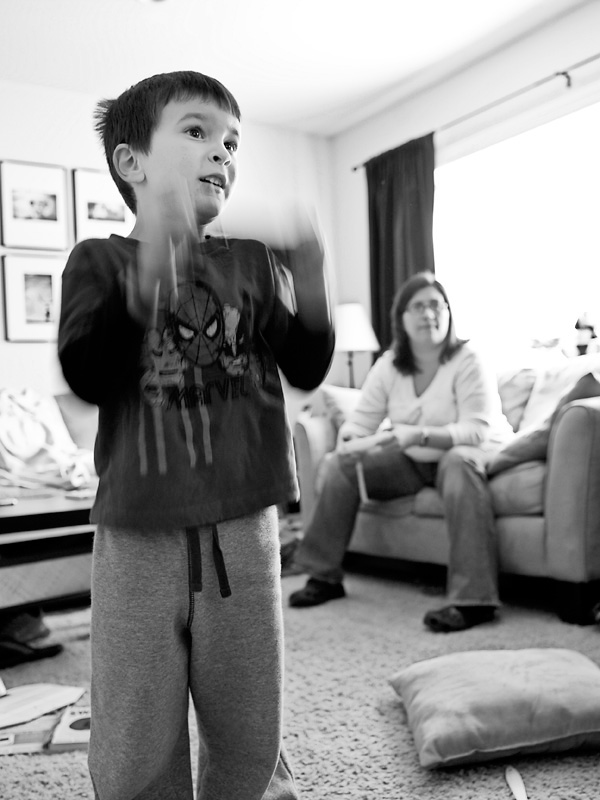
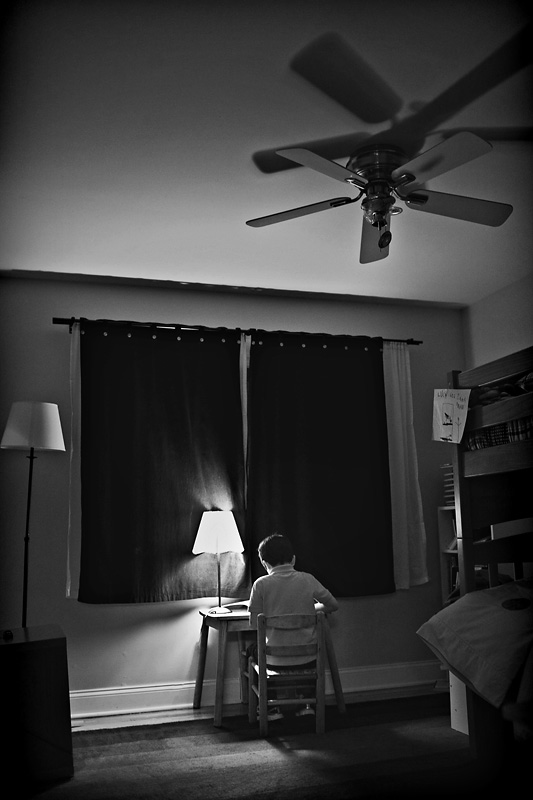
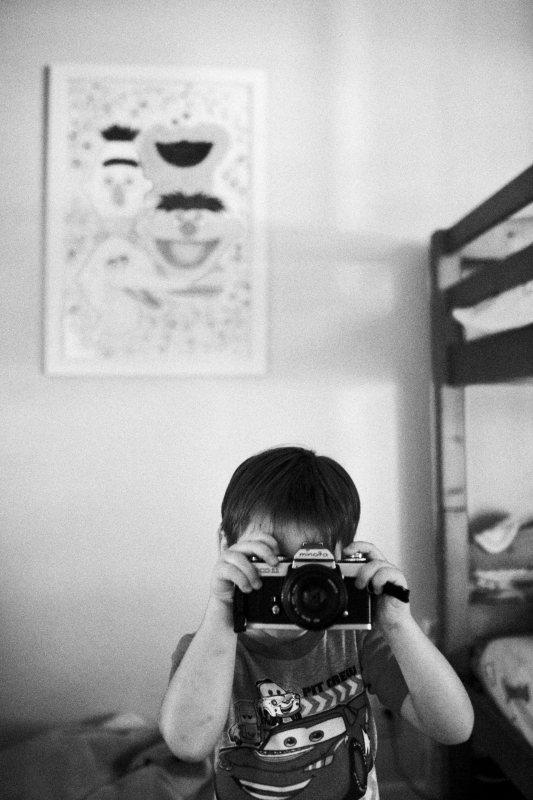
My oldest enjoys using this camera body, which I've "given" to him (a manual minolta body I learned on). Anytime I pull my camera out, he runs to get his as well. He was taking a photo of me. I lined up the painting to his right (rather than directly behind him) and used the edge of the bunk beds to close out the frame. If I left it open, it would still work but would have a looser feel rather than the staunch symmetry afforded by straight, closed lines.

http://www.pbase.com/anerino/image/137804062/original

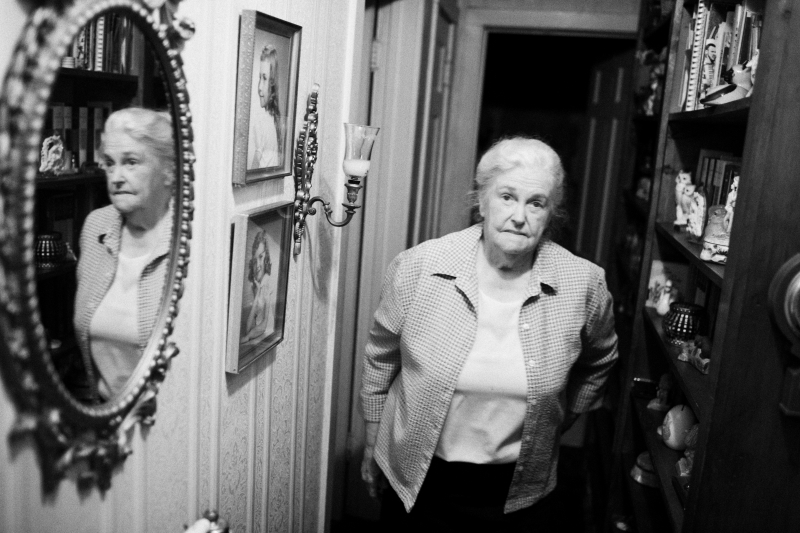
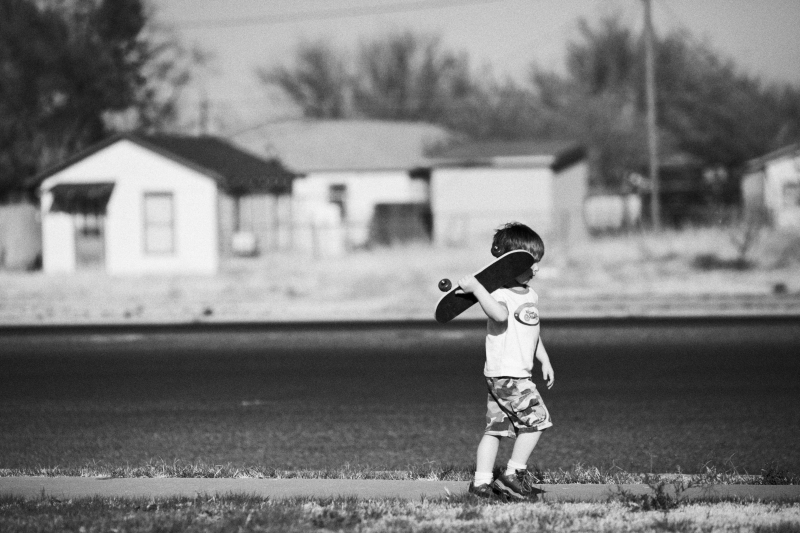
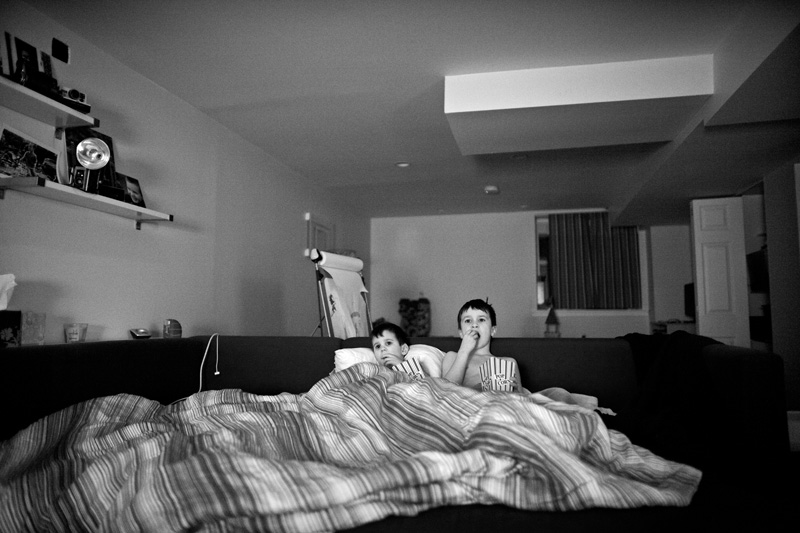
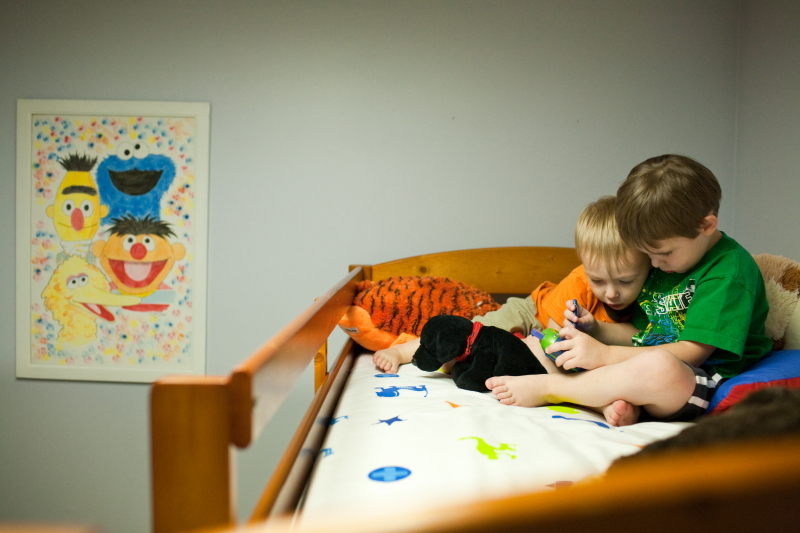
This shot uses that same painting as an element to close out the shot. Again, I like placing the boys to one side of the frame (but still without pushing them to the far edges) and balancing them with a symmetrical element (painting). When you're seeking out a composition, look for those elements which will fill out a shot without becoming busy or "cluttery".

http://www.pbase.com/anerino/image/137804064/original

It took me a long time to learn to see natural lines. It takes practice. It takes studying good photography to see how they did it. I hope this is useful, guys. Have a good one.

Daniel

Monday, August 8, 2011

Using Mirrors

http://www.pbase.com/anerino/image/137089060/original

The shot above was my first realization that I could be in my own shots. True, many of us took at least one picture of our feet early in our photo journeys or perhaps a shot into the mirror but everyone does that. It's a virtual rite of passage. But in the shot above, I incorporated myself into the story of the moment in a less direct way than photographing my feet or myself in the bathroom mirror.

This post will look at creative ways to use mirrors and even how to incorporate ourselves into our images. I find both concepts interesting but as with any other technique, moderation is key. I use techniques such as this sparingly and for some reason (perhaps because I see way too much reliance on gimmicks these days), feel the need to say so.

This next shot is a variation in the same living room as the previous image. This is the same couch and the same mirror in the same living room that I sat on and slept on and jumped on since I was a tyke. It has meaning to me. I didn't want to shoot it the way I had before so I chose to frame vertically. I went for symmetry, so that the objects framing my youngest son would be less literal and more abstract shapes. I also was careful to include my wife in the reflection which provides another layer of content.

http://www.pbase.com/anerino/image/137089059/original

In this next shot, my cousin is reading to my two boys. Again, same couch, same mirror, etc. I think it's a good illustration of how varied you can make your compositions even with almost all of the same framing elements. I chose to include myself as part of the picture as well.

http://www.pbase.com/anerino/image/137089057/original


There is a component of fun in including yourself in shots. My wife decided to take a photo of me and I quickly composed this and fired back. There's a second shot which included my wife's camera flash burst but it seemed too contrived to me. Creative and simple can be adjectives which describe the same shot. It's okay to think simply if you have a handle on the elements of good composition, content and timing. Don't be fooled into the lure of "complex is better."

http://www.pbase.com/anerino/image/137089055/original


This shot is an example of finding a composition and camping on it. I pre-composed, pre-focused, and waited for my grandmother to step out of the guest room. Then, it was simply a matter of timing. Knowing angles helps as well.

http://www.pbase.com/anerino/image/137089154/original

I believe this shot might have appeared on an early post of mine. My apologies but it's one of my favorite mirror shots.

http://www.pbase.com/anerino/image/137089154/original

As always, I hope this is helpful and I hope it finds its way into your photo toolbox, like good spices...used sparingly.

Daniel

Wednesday, August 3, 2011

Effectively Using Deliberate Motion Blur

Let's face it, we are at times limited by creating art within a two dimensional medium. Sometimes photos can feel a bit 'lifeless', especially when what we photographed was moving. I've already discussed the technique of panning, which is a tremendous way to add life to your photos (read that tutorial here: http://thefamilyphotojournalist.blogspot.com/2010/02/panning-how-i-roll.html).

But conditions do not always warrant a full pan. Sometimes we just want to show that things were moving when we captured the scene. Doing so is really rather simple. It just requires you to really focus on technique.

First, slow your shutter down to somewhere near 1/25th of a second. Your shutter speed will vary depending on how much movement you want to show. I personally like when the majority of the scene is sharp and just a small part of the photo has motion blur on it. Once you've selected your desired shutter speed, be sure to think about holding still when you press the shutter. Remember, this shutter speed is most likely slower than you normally shoot. So just be aware.

Below are some examples where I've utilized deliberate motion blur:


My son was playing the Wii and I really liked how his hands were moving. So I selected 1/30th for my shutter speed and waited for him to "hit the ball".

http://www.pbase.com/anerino/image/128935904/original


Same concept below. This was shortly after Santa brought he Wii.

http://www.pbase.com/anerino/image/120702767/original


Later that same night :)

http://www.pbase.com/anerino/image/120694611/original


After writing this post, I realize that I need to do this more!

Good luck! Keep documenting!

Chuck

Monday, July 18, 2011

Isolating for Effect

Hey guys,

I want to talk about isolation in your images. This post addresses single subject isolation for effect.

Any good photo has a subject. (I know, painfully obvious statement.) Sometimes the subject is rather obvious, while it may be less obvious and/or more abstract in others. One of our jobs as photographers is to tell the viewer where to look. Good composition does this.

Now, you've surely seen photographers who shoot everything wide open (widest possible aperture on a given lens) because of the bokeh. Yes, bokeh is nice but it can very easily become a crutch. That's because shooting wide open all the time doesn't require a photographer to carefully consider the background. It's thrown so far out of focus that your eye cannot help but go right to the subject, which is often the only in-focus object. Easy. And sometimes just plain lazy. Whether you shoot wide open, stopped down a couple stops or at "f/8 and be there," you should know WHY you're doing it.

1. Choose your backgrounds carefully. To isolate a subject, the simpler the better.
Here is a shot of my son while on a trip to Texas. His great grandmother had given him a new skateboard and this is all he did for the few days we were there. I stayed back to let him play and used a 135mm lens. I shot from a side angle because I liked the shape of the houses behind him and because the background was uncluttered, he stood out well.

http://www.pbase.com/anerino/image/136262458/original


2. Separation.
I shot this is my son while in Texas. The sun was brilliant and warm. I was shooting close to wide open but I still carefully placed him clear of the sign posts and poles.

http://www.pbase.com/anerino/image/136262457/original

3. Get close.
Getting close to your subject can separate him/her from the background. Part of this lies in the fact that the closer you are, the faster depth of field drops off, even stopped down to f/4-f/5.6. One of the biggest benefits this has is proximity to the lens often catches the eye of the viewer more quickly. This shot below captures a quiet moment of a cousin with her puppy. She and the dog share a moment, completely separate of anyone playing around her. The image conveys that.

http://www.pbase.com/anerino/image/136540067/original


4. Choose your angle.
Below, you see a girl on a slide, alone in her thoughts. What you don't see is the house behind that slide, surrounding trees, other playground equipment or children playing. The low angle eliminated those distractions and set her apart from them all. The result is another quiet, contemplative image.

http://www.pbase.com/anerino/image/136261704/original


The shot below illustrates isolation at its rawest. Simplicity. White walls, a backwards glance, and nothing else. These moments are always both fortuitous and equally intentional. You can't expect them to fall into line regularly and you can't wait until the stars align. As a photographer, your job is to MAKE it happen.

http://www.pbase.com/anerino/image/136540184/original


Hope this is helpful.

Daniel

Thursday, July 14, 2011

Which Camera for Family Photojournalism?

Recently, we received the question: "Can (insert camera here) be used to shoot Family Photojournalism?"

The answer is a resounding YES, regardless of which camera you own or use!

While you may use literally ANY camera, I primarily use a Canon DSLR (1ds2 and 5d2) with an assortment of prime lenses. I choose to use these because it gives me a lot of flexibility when shooting in a wide variety of lighting conditions. For example, I might start photographing my family in my home early in the morning where light is low, but the scene may shift quickly as they move outside. By using a prime lens with a wide aperture setting, I do not have to change lenses when my subjects move into different light.

With that said, ANY camera will work, but there just might be some limitations. My advice would be to understand and work within the confines of those limitations. For example, if you own a Canon DSLR and the standard 18-55mm kit lens, shooting inside without flash will be difficult. Therefore you might want to opt for more outside documentation. Or if you have an old manual focus film camera, you might want to photograph your family when the are more subdued and not participating in an action packed event.

While I do prefer my Canon DSLRs, I occasionally shoot other cameras. I owned two different Leica M6 film cameras with 35mm lenses and REALLY enjoyed them. One of the limitations of the Leica M is that the lenses are manual focus. Additionally, since it is a film camera, you cannot adjust your ISO on the fly. Posted below is one of my favorite sets from last summer. The photos were taken while we were on vacation. We decided to take a late evening beach walk. I only had about a half of the roll of film left in the Leica M6, so these are all the shots from the session. The film used was Fuji Pro 400

http://www.pbase.com/anerino/image/126162825/original

So, to recap, any camera will do! Now go photograph your family!

Chuck

Wednesday, July 6, 2011

Using Multi-Layered Content in Your Family Photojournalism

All too often, I get satisfied with capturing 'single themed photographs' where there is one major piece of content in the photo. For example, let's say my child is digging for worms in the back yard and the light is perfect. I quickly raise my camera, position my little guy in the frame where I want them...and SNAP....I have a decent photo.

But does this photo tell a story?

One thing I try to accomplish when attempting family photojournalism is to tell a story with an image. As I analyze my own work, I'm finding that singular themed photographs (while nice in many cases) just are not that deep and do not always tell the whole story.

More and more I am attempting to focus on having at least two pieces of content in my photographs. I'm finding that the more I concentrate on this, the 'deeper' my photos are becoming.

Take the photo below as an example. I came home from work and went on the back deck to find my wife feeding our youngest child on the table while my two other children circled her like wild banshees. I was first drawn to my wife feeding our child in his new seat (first time he was in it) but I literally told myself, "eh, thats boring, the light is dull, and I have TONS of photos of my children eating." But there was more there. My other children were riding scooters, so I began to think about how to incorporate them into the scene. I knew that my primary piece of content was my wife feeding my child, but I needed a second piece. I grabbed my camera (1ds2 + 24L) and sat down against the rails of my deck and I waited for my children to pass by the frame. When my middle child entered the frame, he looked at me, I pressed the shutter. Think just how different this photo would be if it was just my wife feeding my child WITHOUT my son looking into the camera, riding a scooter, WEARING A SCUBA MASK!:

http://www.pbase.com/anerino/image/135812710/original

As another example, the photo below illustrates how multiple layers of content can add to the strength of an image. My wife was snuggling with our youngest on the couch. I even took photos of them...just her and him...on the couch...boring! But when I stepped back from the scene, there was SO MUCH MORE THERE. My other children were playing the most bizarre game of go fish and were really enjoying themselves. The 1ds2 + 24L was the weapon of choice again. My primary piece of content is my wife and newborn with my secondary piece of content being my older children playing cards. I used a center composition with my older children framing my primary piece of content:

http://www.pbase.com/anerino/image/136206521/original

Finally, the image below is really special to our family. My wife was just a few days away from delivering our third child (the little guy pictured above). Our house was a wreck, yet there was still so much to do. My wife worked tirelessly to make sure our little guy came home to a place conducive to raising a child! This was the end of a very long day for all of us. The older children were snuggled up watching a movie, but my wife was busy folding laundry. Think how different this scene would be if I just photographed my wife, or just the kids. Camera was the 5d2 + 24L:

http://www.pbase.com/anerino/image/135983639/original


So, my challenge to you all would be to wait before you press that shutter. Look around, try to find something else that is going on so that you can add some depth to your photographs! But be patient, it ain't easy!

Chuck

Wednesday, June 22, 2011

Low Light Photography and Digital Noise

When Daniel and I first decided to author this blog, we really didn't anticipate the amount of work that would be involved. Mind you, this work would be in addition to our full time jobs, our part time jobs (both photographers), and our duties as husbands and fathers.

Something had to give. I think we were a bit ambitious in our early planning by trying to post two times a month.

So, from here on out, Daniel and I will post when we can!


A topic that I've been thinking a lot about lately is shooting in low light and dealing with digital noise in images. I have been a member of several internet forums over the years (that's how I learned photography) and have long read about how to minimize digital noise or grain when shooting in low light. Noise is often the result of one of two things: 1) shooting at high ISO values (ie, 1600, 3200, 6400) or 2) underexposing an image and trying to 'push' the exposure in post processing.

Many people advise to avoid setting their ISO values to such high numbers for fear of 'your photo will be all grainy'. You'll read that you should use your flash to avoid the grain. And while this is true, you can shoot at lower ISO values with a flash (because you are forcing more light onto the scene), you will often change WHAT THE SCENE ACTUALLY LOOKED LIKE.

As a photojournalist, I strive to maintain the authenticity of a scene, moment, expression, etc. I WANT the scene to look as it did when I took the photo. For example, if the room is dark and only the TV is on, I WANT my photo to be dark. So if you want to keep your low light scenes 'real', you really only need a fast lens (ie, a prime lens that has a wide aperture such as the Canon 35L f/1.4 or Canon 50mm f/1.4) and the vision to shoot with your ISO above 1600!

Another thing to consider when shooting in low light is your shutter speed. Again, if the scene is dark AND you already have your ISO cranked up, you might be forced to use a slower shutter speed (ie, 1/10th, 1/25th). If you are shooting a wide lens and your subject is static, you shouldnt have a hard time keeping the camera steady...it only takes a bit of practice.


The following examples were shot in extremely low light with slower shutter speeds. Notice, there is a decent amount of 'noise' or grain in them. In fact, I even ADDED some grain in photoshop :)

Movie Night: The only light in the room was the TV. 1/30th, f/1.4, ISO 3200

http://www.pbase.com/anerino/image/135785518/original


Movie Night II: Again, just the TV, in our very dark basement. 1/25th, f/1.4, ISO4000

http://www.pbase.com/anerino/image/135785550/original


Homework: Only light was the small lamp in the photo. 1/60th, f/2.8, ISO3200

http://www.pbase.com/anerino/image/135785549/original


Wii: Only the TV as a light source. 1/40th, f/2, ISO3200

http://www.pbase.com/anerino/image/120694611/original


Book Time: One of my all time favorites. Taken with just the light from under the bunkbed. 1/80th, f/1.6, ISO 3200

http://www.pbase.com/anerino/image/107248879/original


I really feel like the use of flash would have DESTROYED these images. So, turn your flash off and crank your ISO up! Preserve the authenticity!

Chuck