
The “Seeing in Black and White” Black and White Conversion!
As I am sure you noticed by now, I like black and white photographs! When I first began taking photographs, I chose to convert to black and white for a few reasons (both the wrong reasons). First, I thought it made me an artist (its pretty funny to admit that). Second, I had ZERO understanding of white balance and fell in love with the phrase, “when in doubt, convert it out!”. Since those days, I have taken great pride in my black and white conversions (I use several techniques). I will cover many different conversion methods as this blog grows.
Today, I am going to focus on the “Seeing in Black and White” conversion method where much of the “conversion” is done when you take the shot vs. trying to do it all in Photoshop! Yep, it’s that easy! This technique is accomplished literally 10 seconds in Photoshop! However, in order to get the best results, there are a few variables that you should be looking when photographing your subjects since this method requires you to analyze the scene before hand.
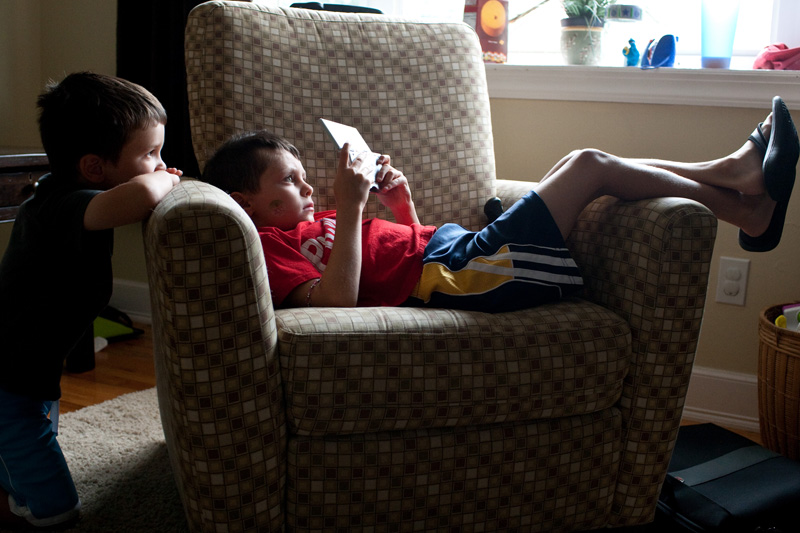
Just some detail about why I employed the “Seeing in Black and White” technique with this photograph. I knew that conditions were ideal for a black and white photograph before I even pressed the shutter. First, the light was “good” (soft and directional). Second, it was coming from the large bay window my living room. It is the only window in the room. All artificial light was turned off. I think many people make the mistake of leaving lights on when working with window light. Additional lighting will kill the shadows. Third, my subjects were facing the perfect direction for this method of conversion (the light source evenly lit both of their faces). Shadows were cast behind my subjects forcing attention on their faces.
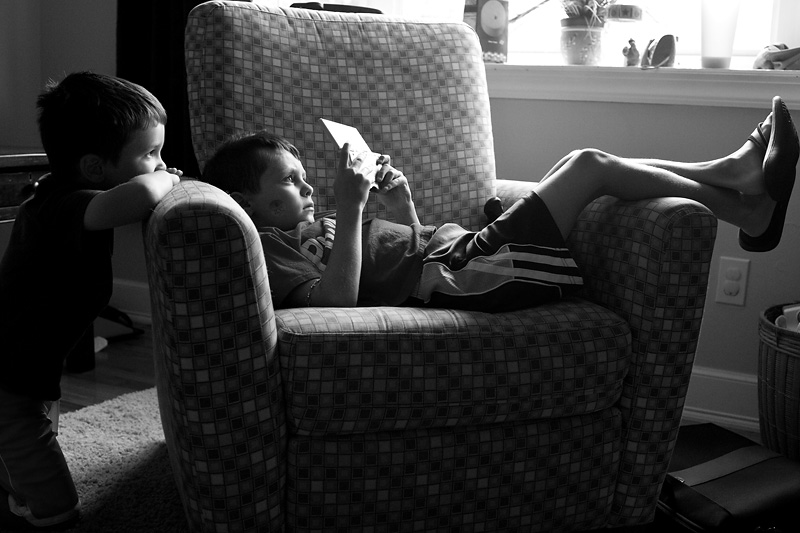
By using the “Seeing in Black and White” method, you drastically limit the amount of time you need to spend in Photoshop. Here is what I did in Photoshop to get to the image below:
1. Open image.2. Click “Image” > “Image Adjustments” > Channel Mixer.
3. With the Channel Mixer dialogue box open, check “monochrome”.
4. Enter values 25, 35, 40 and click “OK”.
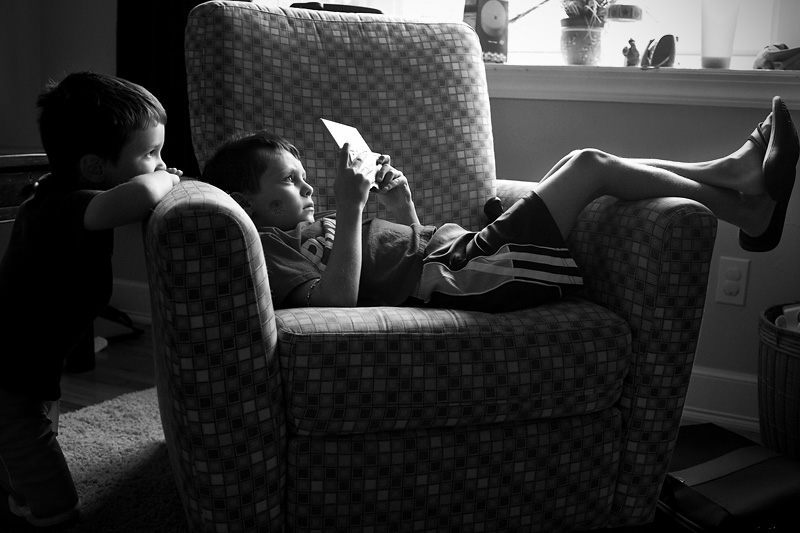
Taking your Black and Whites to the next level.
How to Dodge and Burn in Photoshop
1. Duplicate your layer (CMD + J).2. Click “Edit” > “Fill”
3. Choose “50% Gray” from the Contents pull down and click “OK”.
4. Go to your “Layers Palette” and set the gray layer to the “Overlay” blend mode.
5. Select your paint brush. Make sure the “hardness” of the brush is about 50%. Make sure the opacity of your brush is around 12% and the flow around 30%.
6. Set the color of your brush by using the shortcut “D” (that’s right, just press “D” on your keyboard and the colors will turn black and white).
7. To brighten an area, make sure white is selected. To darken an area, make sure black is selected (“X” switches between the two colors).
8. With the color desired, simply paint areas that you feel need lightening/darkening.
9. Flatten your layer when you are finished (Layer > Flatten Layer).
Thanks for checking in!
Best Regards,
Chuck
A crystal clear, elegantly written tutorial. Your superb results speak for themselves.
ReplyDeleteGreat primer, Chuck! This makes me wish I were a student in your photo class =P
ReplyDeleteAn even easier way to make that 50% gray layer is to go to Layer > New > Layer. In the box which comes up, set Mode (dropdown menu) to Overlay, and then check the "Fill with 50% grey" box that becomes active just below it. All done in one menu, very easy to use.
ReplyDeleteI love your blog. I have been reading though it the past few days and it is SO inspiring. I wish i could afford a 1.4 prime :(
ReplyDelete